Reactive Extensions (RX) and Your Mouse as a Database

I’ve been learning a lot of Reactive Extensions (Rx) lately, and in the spirit of learning I decided to share some 984368initial thoughts on the concepts and give a very light overview.  Rx is very deep, but hopefully this article gives you an initial understanding and examples to solidify the knowledge.

If you haven’t heard of Rx before, I highly recommend reading Erik Meijer’s blog post in which he describes an alternate way of thinking about events.  In short, he describes events (mouse clicks, keyboard events) as a stream of data.  Think of an array where you have a list of items but with the added element of time in between each item.  For example, as your mouse moves it creates a stream of coordinates. (The dots represent time passing)

mouseMoves = [….{x: 45, y: 45}…….{x: 45, y: 50}…..{x: 50, y: 50}…]

See, mouseMoves is just an array with time between the items.  This is what is known as an Observable.

Once we have an observable, we can do all kinds of things to the stream of data.  We can filter it for certain items, we can map over each data item and transform it to something else, we can merge it with another Observable to create a new data stream.   The documentation for the javascript implementation, gives you just a taste of what you can do.

A Practical Example – Mouse Moves

Let’s say that we want to add a listener to our page that detects whenever the mouse hovers over an image tag.  In addition, while we want to know whenever the mouse is hovering over the image, we also want to throttle the number events actually occurring.  The following Rx code accomplishes this in just a few lines of code.

Let’s take this line by line to see just what is happening.

After querying the page for a list of image tags, we create two new Observables by attaching them to the images DOM list.  These observables are now listening to all mouseover and mouseout events.

// Listen to the stream of mouseover events
var mouseOvers = Rx.Observable.fromEvent(images, 'mouseover');

// Listen to the stream of mouseout events
var mouseOuts = Rx.Observable.fromEvent(images, 'mouseout');

Now that we are listening to events, we want to filter these events to only return every 300ms (as opposed to very fast which it would do right now) and only while we are still hovered over an image.  Here’s how this code works. We loop over the list of mouseover events streaming in using ‘map’. For each event we occur, we create a new Observable that is delayed by 300ms.  And lastly, we filter that nested observable with the ‘takeUntil‘ operator so that we only return a valid event if the mouse has not left the image.  At this point, the event is then returned to the outer ‘map‘ result for the final operator, ‘switchLatest.’ Switch latest takes in a stream of events and returns only the most recent event. This operator is especially useful for ajax calls, where you may have made a few requests, but only care about the data from the most recent request made.  Likewise, this returns the most recent mouseover event that was valid.

// Create an Observable for all mouseOvers
var imageHover = mouseOvers.
    // For each (map) mouseOver event
    map(function(e) { 
        // Wrap the event with an another Observable, so we can throttle it
        return Rx.Observable.return(e.target).     
            // Wait to see if the mouseOver is still on this same boxart
            delay(300). 
            // Don't return anything if a mouseout occurred, this stops the observable from returning anything else
            takeUntil(mouseOuts);                     
    }).
    // Return the last throttled event
    switchLatest();  

Now that we’ve created our observable with its propers filers, we simply ‘forEach‘ or ‘subscribe’ over the stream as if it were an array.

// Subscribe to the img hovers
imageHover.subscribe(function(x) {
    console.log('Mouse over image with alt tag: ' + x.alt);
});

That’s it!  We can now listen for mouseover events on images like an array.

This is just scratching the surface of Rx and we haven’t even touched on how Observables automatically unsubscribe themselves from events or handle errors.  If you’d like to learn and play more with observables, I highly recommend giving Jafar Husain’s interactive tutorial a try.

How to “kill it” at a hackathon

I’ve participated in a lot of hackathons over the last few years and luckily even won a few. (TechCrunch twice, Facebook, Angelhack) Hackathons are a great way to try out a new idea and get immediate feedback from the community.  They’re social, challenging and always a blast.

But sometimes they can be extremely frustrating due to poor planning, crunched time and various other factors. Here are few lesson’s I’ve learned the hard way, but I write this in hopes of saving you some pain.  Here’s what TO DO, if you really want to “kill it” at your next hackathon.

Show Up With An Idea

I can’t even begin to tell you what a bad choice it is to show up with no idea of what you’ll be working on.  I’m going to be stressing this fact, on every bullet point, so here the first time.  Your time is extremely limited. You don’t have time to wander around trying to come up with an idea of what to build.  You should come prepared with at least a vague idea or two, of what you’ll be working on.  Now, I’m not saying you have to have it completely planned and mocked out, but come with a plan.

Also make sure that the problem you are trying to solve is actually a problem.  Ask a few friends if they would use it.  If you can’t find any takers, chances are the judges won’t either.

Sell The Idea, Not The Code

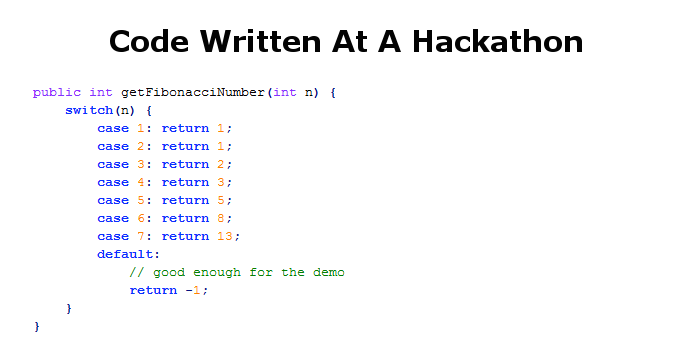
At the end of the day, you’re presenting an idea to the audience and your job is to sell it.  The code doesn’t have to be pretty or work flawlessly.  In fact, no one will most likely ever look at it again.  Focus on what problem your trying to solve and gear all of your effort towards demoing that. Visually.  Sell the crowd and judges on what makes your concept, not your code, amazing and disruptive.

The truest code ever written at a hackathon. Not pretty, but it will work.

Stick To What You Know

A lot of people use a hackathon as a time to try out a new frameworks and even programming languages.  If you goal is to learn, have at it. If you want any possibility of winning, stick to what you know.  Your time is limited and you can’t afford to spend 5 hours learning how to use a new 3rd party API, a new language, or anything else new.

Prepare For Bad WiFi

The wifi will be slow so prepare to work and demo locally.  This gives you the huge advantage of faster iteration cycles during development and a demo which is fast and smooth.  Why hinge your entire project on an uncontrollable external factor?

Deliver A Great Demo

Remember the demo is the ONLY thing any one sees at the end of the day.  Make sure the demo is clear and gets your idea across.  In addition, practice your presentation over and over, making sure you articulate the problem and how your project solves that problem.

With these time saving tips in mind, I wish you all the best in your hackathon endeavors and hope you have a blast at your next hackathon.

ReactJS – Componentize all the things

Been taking a look at ReactJS over the last few days, which is an interesting view library from the folks over at Facebook.  What I really like about it so far is the “componentization” of  objects on a page.  The general idea being,  any part of the page should be able to stand on its own.  Think widgets.  In theory this is a nice idea until components need to interact.  For example, a list of items with a search box that filters the results.  Component 1 is the search box, Component 2 is the list of items.  In the traditional MVC pattern, the controller would be responsible for handling this interaction.  In react, you would create a parent component which would handle the passing of state change to the list component.  It doesn’t really matter what the parent component is, just that its children are the list and the search box.

Considering the issues I have with the traditional MVC pattern for front end web apps, I’m interested in how this approach by ReactJS performs in the real world at scale.  Especially on very interactive web apps.  In past large web apps, I’ve used an event bus to facilitate the communication between components and thereby reduce tight coupling.  My initial concern is that there will be hooks and callbacks being passed through each component in ReactJS, making the code a challenge.

Time to dig in and see the real world results.

Prototypal inheritance of Instantiated vs Non-Instantiated Objects in Javascript

I recently read The Principles of Object-Oriented JavaScript by Nicholas Zakas and was enthralled by his patterns for prototypal inheritance of both instantiated and non-instantiated objects.   As I put each of these patterns to practice I noticed an interesting “discrepancy” between the the way each was linked to its parent.  I thought it was interesting enough for me to dig into, so it might make an interesting blog post.

Example 1: Instantiated Object Inheritance

In the example below, we create our parent class “Animal” which is created via the function method.  We attach a simple method to the prototype which retrieves the private “species” variable.

Then we create a “Dog” subclass by creating it via the function method, then linking the two classes with

Dog.prototype = Object.create(Animal.prototype);

This overrides the default Dog prototype with the Animal prototype, resulting in the correct prototype chain.  Here is a very abbreviated version of the prototype chain.

Screen Shot 2014-05-14 at 4.43.33 PM

Note the very important constructor attachment required after we override the prototype.

Dog.prototype.constructor = Dog;

Pretty common sequence to chain these two classes together.  Any changes made to Animal will get automatically chained to Dog.  Now let’s take a look at the non-instantiated example.

Example 2: Non-instantiated Object Inheritance

In this example we’ll use a IIFE (Immediately-invoked functional expression) to create our parent class, with our retrieval function as above.  This pattern is common for singleton type use cases.

Now notice how we chain the prototypes of the Animal and Dog classes, specifically what is passed to the Object.create() function.

var myDog = Object.create(animal);

No mention of a prototype!  Why not?  Why are we attaching the object itself instead of its prototype?

The reason is because of what Animal is in this second example.  In example 1, Animal was created via the function literal resulting in an object with a full prototype chain inherited from Function. In the second example, animal was created via the inline object declaration “{}” resulting in an object with a prototype of “null”. To put it shortly, an object only has a prototype property if it was created via function literal.

Screen Shot 2014-05-14 at 4.43.40 PM

So if you called the following code, you would get a big fat error because animal has no prototype property.

var myDog = Object.create(animal.prototype); //TypeError

So in example 2, the Animal object itself is what gets chained to myDog. MyDog  can now add its own methods without modifying the original Animal object.


Importing Issues from a CSV file in Youtrack

Don’t get me wrong, I think YouTrack is a great tool. But when it came to importing data from my old bug tracking tool to YouTrack, I was banging my head against the wall. Their current instructions are lacking examples and the whole process seems to have holes. So for anyone looking for CLEAR instructions with examples on how to import data from a CSV file into YouTrack, here it is:

1.) Download the latest version of YouTrack’s Python Client Library and unzip it.

2.) Make sure you have Python installed on your computer

3.) Copy this blank CSV file to <unzipped library directory>\python\csvClient

4.) Add all of your data to the blank CSV file mentioned in step 3.

  • If you need to add new columns, make sure that the name matches exactly what’s in YouTrack. E.g. “Estimation” in the CSV matches with “Estimation” in YouTrack
  • The “Issue Id” column should just be auto incrementing numbers
  • The date fields must match the format specified in the “youtrackMapping.py” file mentioned below.  Feel free to update your file if needed

5.) Overwrite the “youtrackMapping.py” file in the <unzipped library directory>\python\csvClient directory with this one.

6.) Execute the following command from the <unzipped library directory>\python\ directory

python csv2youtrack.py csv_file youtrack_url youtrack_login youtrack_password

Here’s what mine looks like python csv2youtrack.py csvClient/import.csv http://test.myjetbrains.com/youtrack youtrack_login youtrack_password

7.) The script will probably take forever to run, but give it time.  If it error’s out, I’ve listed some common errors and solutions below.

Common Errors

Traceback (most recent call last): File "csv2youtrack.py", line 140, in main() File "csv2youtrack.py", line 20, in main csv2youtrack(source_file, target_url, target_login, target_password) File "csv2youtrack.py", line 31, in csv2youtrack source = Client(source_file) File "/Users/tony/Downloads/youtrack-rest-python-library-master 2/python/csvClient/client.py", line 8, in __init__ self._header = self._read_header() File "/Users/tony/Downloads/youtrack-rest-python-library-master 2/python/csvClient/client.py", line 11, in _read_header header = self._get_reader().next() _csv.Error: new-line character seen in unquoted field - do you need to open the file in universal-newline mode?

This occurs when the newline characters in the csv are ill formatted, usually due to Mac OS.  Resave the CSV using Unix or Windows line endings.

MTG Scavenger v3.0 Launched!

promo_800

Introducing the completely rebuilt MTG Scavenger. Everything has been rebuilt from the ground up to provide a faster, more responsive user experience, tuned to exactly what you’re looking for. One of the biggest new features that’s been added is the ability to add your own custom card values. So if you feel the current card value is too high, you can change it!

Wait! What is this?
I built this to find cards ending soon on eBay, trimming out all the “fat” and showing only cards that are under valued / under priced. There are a ton of filters, so you can hone in the results to exactly what you’re looking for, then save/bookmark your filters to check in on only the auctions you care about. Basically it saves you tons of time, giving you a competitive advantage on buying magic cards.

http://mtgscavenger.com/

New Features:
* You can now set YOU OWN card values/prices
* Responsive design works beautifully on mobile devices
* Cleaned up interface put the most important information up front
* Improved search results
* Faster load times

Coming Soon
* Set custom pricing in other currencies
* Get notified when a card is ending below your custom price
* Lots more!

The site is in beta at the moment and is by invite only for now. If you’d like to get in on the beta, here’s a few invite codes to get you started. If these run out, ask a friend or hit me up. I’d also like to hear your feedback so feel free to contact me, tony@mtgscavenger.com. Cheers!